How To Propagate Snake Plant: 4 Easy Methods

There’s something magical about turning one snake plant into many. I remember my first propagation attempt—a single leaf cutting that sat in water for what felt like forever before finally sprouting tiny white roots. That moment of success hooked me, and over the past decade, I’ve turned that initial excitement into a reliable process that works every time.
Whether you’re looking to expand your plant collection, share cuttings with friends, or rescue a damaged plant, propagating snake plants is surprisingly straightforward. The key is choosing the right method for your situation and having a little patience.
Quick Answer: Propagating snake plants is simple; you can root leaf cuttings in water or soil, divide a mature plant, or pot up rhizome offshoots. Water propagation is beginner-friendly but slow, while division gives you instant, rooted plants.
Essential Tools and Materials for Propagation Success
Before we dive into the methods, let me share the essential toolkit that I’ve refined through years of propagation experience. Having the right tools isn’t just about convenience—it’s about giving your cuttings the best possible start.
- Start with sharp, sterilized pruning shears or a clean knife: This is crucial because when you cut into a plant, you create an open wound that’s vulnerable to bacteria and fungi. I always wipe my tools with rubbing alcohol before each cut—this simple step prevents pathogens from transferring to the fresh wound and dramatically improves success rates.
- For containers, you have options depending on your method: clear glass jars work beautifully for water propagation (letting you watch roots develop), while small pots with drainage holes are ideal for soil propagation. If you’re eco-conscious, recycled glass jars work perfectly and add a personal touch.
- The right soil makes all the difference: I recommend a well-draining cactus or succulent mix because snake plants are adapted to environments where soil dries quickly. Their roots are sensitive to excess moisture, and waterlogged soil can lead to rot. A gritty mix mimics their natural habitat and sets your cuttings up for success.
- A few optional items can enhance your results: Rooting hormone can speed up the process by 1-2 weeks, especially in soil propagation. If you’re working in a cooler or dimmer space, a heating mat or grow light helps maintain ideal conditions.
The key is keeping your sterilization supplies handy—I always have rubbing alcohol nearby to wipe tools between cuts. This attention to cleanliness has saved countless cuttings in my experience.
1. Propagate Snake Plant from Leaf Cutting
I’ve found that propagating a snake plant from a leaf cutting is one of the most common ways plant lovers get started—and for good reason. It’s accessible, rewarding, and teaches you the fundamentals of plant regeneration. Whether you choose water or soil propagation, understanding leaf cuttings is essential.
Selecting the Perfect Leaf: Your First Critical Decision
This is the most important step, and here’s what to look for:
- Firm, deep green leaves with no yellowing or damage
- Mature leaves from the outer part of the plant
- Avoid weak or stressed leaves—they lack the energy for successful propagation
Pro tip from experience: I learned the hard way that using weak or damaged leaves almost always leads to mushy disappointment. Choose the healthiest leaves possible for the best results.
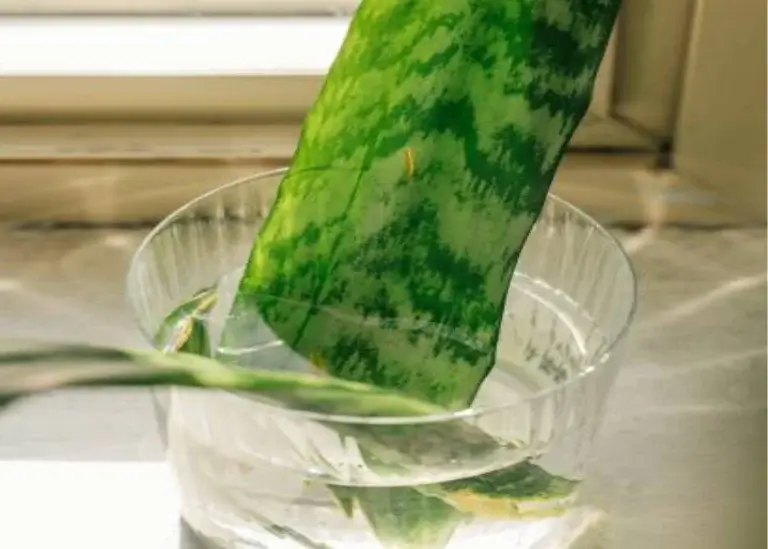
1.1 How to Propagate Snake Plant in Water

I love water propagation for its simplicity and transparency. There’s something deeply satisfying about placing a leaf cutting in a clear jar and watching the roots slowly emerge. It’s easy to monitor progress without disturbing the plant, and there’s less risk of overwatering since the cutting only absorbs what it needs. Seeing those tiny white roots snaking through the water feels like a quiet victory—proof that regeneration is underway.
That said, it’s not without its challenges. Rooting in water tends to take longer, and if I forget to change the water regularly, rot can creep in fast. I’ve learned the hard way that stagnant water is a silent killer. And while watching roots grow is thrilling, transitioning them to soil can be tricky—those delicate water roots don’t always adapt well, making the move feel like a gamble.
Step-by-Step Guide:
- Take Your Cutting: Start with clean, sharp shears to snip a healthy leaf near its base. If the leaf is long, you can cut it horizontally into 3–4 inch sections for multiple propagation attempts. Before placing the cuttings in water, let them sit out for a few days to allow the cut ends to callous—this helps prevent rot and sets the stage for healthy root development. Pro Tip: Mark the bottom of each section (the end that was closest to the soil) with a small notch or use a permanent marker. This will definitely prevents planting the snake plant from the upside down later!
- Callous Over: This is the most important and most crucial step! Cuttings should be sit out in the open air or any airy place for 2 – 4 days. When the cutting will dry out then they forms a protective layer and these layer helps prevent rot once the cutting goes into water. Although It’s a small pause but this makes a big difference.
- Place in Water: Easy and safe method is to set the cutting upright in a clear jar or glass. Cover only the bottom 25% of the cutting with filtered or distilled water—just enough to submerge the calloused end. You should not have use the tap water, if you will use then it will cause of chemicals which are the main factor to stop the growth.
- Find the Right Spot: Now the question is that where we should place the jar or glass during the propagation? Don’t worry we can help you, place the jar in a spot with plenty of brightness, and indirect light. If the direct sunlight hit them then it can cause of lot of issues one of them is that it can easily cook your cutting.
- Maintain It: Change the water completely from 5 to 8 days as to keep it fresh, healthy and oxygenated and also try to prevent bacterial growth.
- Wait Patiently: Small white roots beginning to form in 4–6 weeks in ideal environment. Usually It will take 2–3 months for a new pup (baby plant) to emerge from the base. Expert Tip: Provide bright, indirect light for your cuttings to encourage root development and new growth without scorching the delicate plantlets.
- Maintain a consistent room temperature (ideally 70-85° F / 21-29° C).
- Heads-up for Variegated Types: If you’re propagating a variegated cultivar like the classic ‘Laurentii’ or ‘Moonshine’, be aware that leaf cuttings in water often revert to the solid green parent plant. The new pups will likely lose their beautiful yellow edges or white stripes. To guarantee the variegation is copied, your best bet is division.
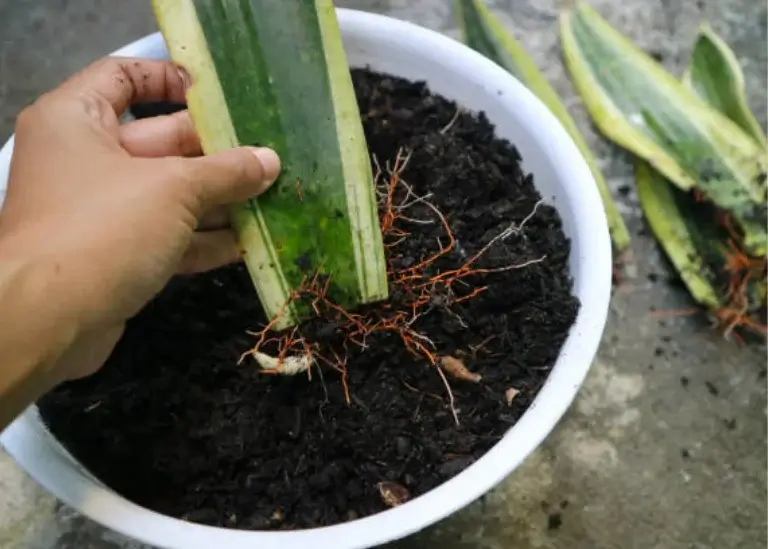
1.2 Propagating a snake plant in Soil

This is my preferred method now because it allows the roots to develop right where they’ll eventually grow—directly in the soil. That means less transplant shock later on, since there’s no need to move the cutting from water to dirt. For some varieties, I’ve found the initial rooting is actually faster in soil, especially when the environment mimics their natural habitat. It feels like giving the plant a head start in the conditions it was meant to thrive in.
Still, it’s not always beginner-friendly. You can’t see the roots forming, so it’s harder to know what’s happening below the surface. If the soil stays too moist, rot becomes a real risk—and figuring out the right watering rhythm takes practice. I’ve had cuttings fail simply because I overestimated how thirsty they were. It’s a method that rewards patience and restraint, but once you get the hang of it, it’s incredibly reliable.
How to Propagate Snake Plant Cuttings in Soil:
- Take and Callous: Same like with the method of water propagation, take your leaf cuttings and allow them to callous over for 2 -3 days.
- Use Rooting Hormone (Optional): Dip the calloused end into a rooting hormone powder or gel. This method is not necessary for snake plants, but if you adopt this it can speed up the rooting process and increase success rates.
- Plant: Place the cutting about an inch deep into a small pot filled with a well-draining succulent or cactus mix. Ensure the pot has a drainage hole. Expert Tip: Mark the bottom of your leaf cuttings with a ‘V’ shape or a small notch to ensure you plant them in the correct, downward orientation.
- Water Lightly: After planting, moisten the soil lightly . Going forward, water only when the top 1-2 inches of soil are completely dry. The goal is lightly moist, never soggy.
- Provide Warmth and Light: Place the pot in a warm spot (70–90°F/21–32°C is ideal) with bright, indirect light.
- Wait: Roots will develop underground in 3–6 weeks. Since you can’t see them, your sign of success will be the emergence of a new shoot, which can take a bit longer.Unlike water propagation, you won’t see roots. Test for rooting by gently tugging the cutting; if there’s resistance, roots have formed.
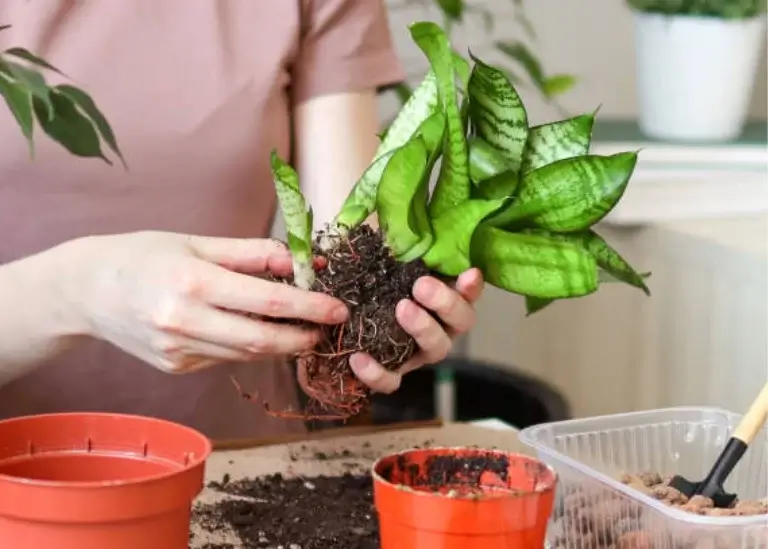
2. Propagate a Snake Plant by Division

If your snake plant is large and has multiple rhizomes or offshoots (pups) emerging from the soil, division is a fantastic and instant option. I love this method because it gives you a fully formed plant right away—no waiting for roots to develop. It’s also the only way to guarantee an exact clone of a variegated mother plant, which is a huge win if you’re trying to preserve those striking patterns. Plus, dividing a healthy plant can actually boost its overall vitality, creating strong, mature offshoots that thrive on their own.
Division isn’t for every plant or every gardener. It requires a mature, multi-stemmed specimen, and the process can be a bit invasive. If done carelessly, it can stress both the plant and the gardener! I’ve learned to take my time, use clean tools, and work gently—because while the payoff is instant, the method demands respect.
How to Divide Dracaena Trifasciata:
Start by gently removing the plant from its pot—don’t yank or rush it. Tip the pot sideways and slide the whole root ball out with care to keep the roots intact.
Next, brush away the excess soil so you can see where the clumps begin and end. Snake plants naturally grow in clusters, each with its own root system. Look for sections that can be separated cleanly.
Then, use your hands or a clean, sharp knife to gently tease or cut the rhizomes apart. Ensure each new piece has at least two or three healthy leaves and a solid root base.
Place the newly potted plants in bright, indirect light.
Expert Tip: Provide bright, indirect light for your cuttings to encourage root development and new growth without as established snake plants, watering only when the soil is completely dry. scorching the delicate plantlets.
Finally, repot each division into fresh, well-draining soil, water lightly, and place them in bright, indirect light.
3. Rhizome Propagation
A clever method when you spot thick, underground stems (rhizomes) peeking out of the soil.
Sometimes, you’ll see pale, finger-thick runners growing horizontally just under or above the soil line. These are rhizomes, and they’re how the plant spreads. You can harvest these to grow new plants.
How to Propagate via Rhizome:
- Unpot the Plant: Carefully remove your snake plant from its pot.
- Locate a Rhizome: Gently brush away the soil to reveal the rhizomes. Look for a healthy, firm section that has at least one growth point or “eye” (a small bump where a new shoot can form) or better yet, a tiny pup already attached.
- Cut it Free: Using a sterile knife, cut a 2- to 3-inch section of the rhizome.
- Callous: Let the cut end of the rhizome dry and callous over for 1-2 days.
- Plant: Plant the rhizome section horizontally or vertically in a well-draining potting mix. Water very sparingly—just enough to barely moisten the soil—until you see new growth emerge.
This method is faster than leaf cuttings and, like division, preserves the variegation of the mother plant.
Caring for Your New Snake Plant Babies
- Light Requirements: Provide bright, indirect light for your cuttings to encourage root development and new growth. Avoid direct, harsh sunlight which can scorch tender new growth.
- Watering Schedule: Water thoroughly but infrequently. Allow the soil to dry out completely between waterings to avoid overwatering, which can cause rot. Treat newly potted cuttings like mature snake plants once they’ve established roots.
Pro Tips for Faster Rooting & Success
For success, remember a few key things. Your cuttings need a warm environment (70–90°F/21–32°C) and bright, indirect light to fuel growth and encourage rooting.
The number one killer is overwatering, so when in doubt, let the soil dry out. Always use a chunky, well-draining succulent mix, and above all, practice patience—these plants operate on their own schedule.
Read our complete guide on How to Care for Snake Plants
What Kind of Light Will Your Cuttings Need?
Light is non-negotiable—but it doesn’t work alone. If your snake plant cuttings aren’t getting the right light and the right temperature, they’ll just sit there like decorative sticks.
What they crave is bright, indirect sunlight. Not harsh midday rays that fry the leaves, and definitely not the dim corner of your living room. Think soft morning light or filtered sunshine near a window. If you’re using a grow light, keep it gentle and consistent—around 10 to 12 hours a day.
Now here’s the part most people miss: warmth. Snake plants are tropical by nature, and their cuttings won’t root unless the temperature feels like spring. Aim for a cozy range between 70 and 90°F (21–32°C). If your space dips below that, especially at night, rooting slows to a crawl—or stops altogether.
So before you snip a leaf or prep your soil, ask yourself: is the spot warm enough and bright enough? Because without both, your cuttings won’t stand a chance—and even under ideal conditions, expect it to take at least 6 to 8 weeks before you see any roots forming.
Common Snake Plant Propagation Mistakes to Avoid
- Skipping the Callous: This is non-negotiable. Planting a fresh, wet cutting straight into soil or water invites rot.
- Overwatering: Keeping the soil constantly wet is a death sentence. Snake plants are drought-tolerant and thrive on neglect.
- Planting Upside Down: If you’re using leaf sections, marking the bottom end is crucial. An upside-down cutting will not root.
- Giving Up Too Soon: These are slow-growing plants. If you don’t see growth for months, don’t assume it’s failed. As long as the cutting isn’t mushy or brown, there’s still hope.
Snake Plant Propagation FAQs
Q1: How long does it take for snake plant cuttings to root?
Typically 4-8 weeks for water propagation, and 6-10 weeks for soil propagation. New pups can take even longer to emerge.
Expert Tip: Patience is a virtue.
Q2: Can I propagate snake plants from a single leaf?
Yes, you can. Cut a healthy leaf into 2-4 inch sections, ensuring you note the bottom end for planting.
Q3: Why are my snake plant cuttings turning yellow/mushy?
This usually indicates overwatering, stagnant water, or insufficient callusing. Ensure you let cuttings dry for 2-3 days before planting and avoid keeping soil too moist.
Q4: When to propagate Sansevieria?
Spring and early summer are the best times to propagate. That’s when the plant is actively growing and more likely to root quickly. Avoid doing it in winter, when growth slows down and the cuttings might struggle to take off.
Q5: Will variegated cuttings stay variegated?
Leaf cuttings from variegated varieties often revert to solid green. Use division to preserve patterns in cultivars like ‘Laurentii’ or ‘Moonshine’.
Final Thoughts
After propagating hundreds of snake plants from leaf cuttings, I’ve learned that clean cuts, proper callousing, and resisting the urge to overwater are the keys to success. Remember that even experienced propagators encounter setbacks—the important thing is learning from each attempt.
Leaf cuttings teach patience and observation skills that will serve you well with all your future plant propagation endeavors!
